
Accessible LaTeX 101
This page is a quick getting started reference for using the new accessibility features of LaTeX, with instructions for both Overleaf users and local installations.
Overleaf
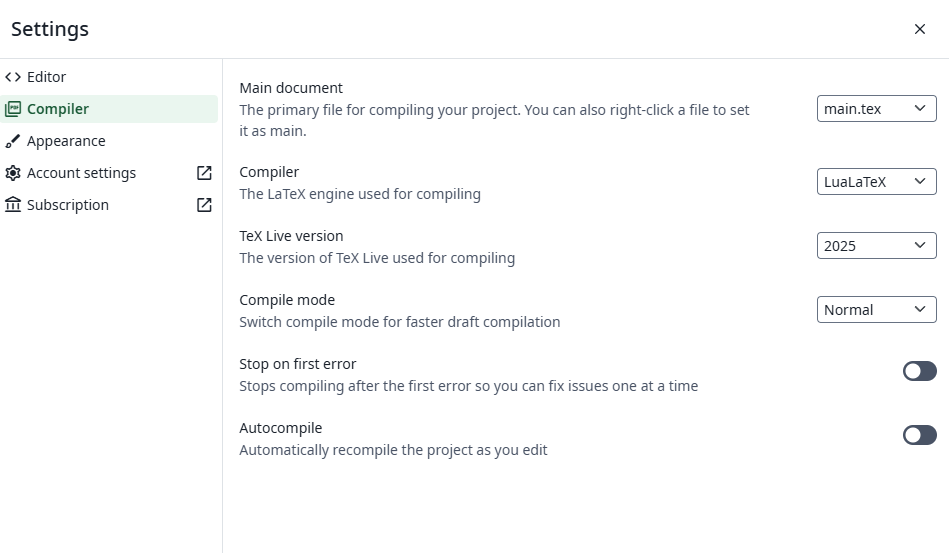
First, go to the File -> Settings -> Compiler menu in your Overleaf project. Make sure that the compiler is set to LuaLaTeX and the TeX Live version to the latest year. For the most up-to-date build with added features and bug fixes, you can join the Rolling TeX Live feature and then set the TeX Live version to Rolling TeXLive. In particular, this allows you to create accessible slide decks with the new ltx-talk document class.
Now, in your main.tex file, add the header code below at the very top of the document.
% This command activates the tagging and pdf management code
\DocumentMetadata{
 lang=en-US, %set the language (adjust if not US English)
 tagging=on, % turn on tagging for accessible pdfs
 % produce MathML representation of mathematical content
 %flag the first row of all tables in the document as a header row
 tagging-setup={math/setup={mathml-SE,mathml-AF},table/header-rows={1}},
 % set the pdf standard that this document should comply with/be tested against
 pdfstandard={ua-2,a4-f}}

\documentclass[12pt]{article}
\usepackage{amsmath, amsthm}

% Compile with LuaLaTeX
\usepackage{unicode-math}
\usepackage[olddefault]{fontsetup}
\usepackage{hyperref}

\title{title of document}
\author{your name}
This enables all of the automatic tagging of the structure and mathematics in your document. Each image included in your document needs to either be marked as an artifact if it carries no meaning by adding the artifact key as an optional argument to \includegraphics or have alt text added with the alt={My alt text here} optional argument.
For example, you might have
\includegraphics[artifact]{star_background.png}
\includegraphics[alt={Portrait of Isaac Newton}]{newton_portrait.png}
Local Installation
The only difference from working in Overleaf is that you have to update your installation yourself. Use the TeX Live, MacTeX, or MiKTeX installation instructions as per your operating system (and IT permissions) to get a current installation.
Remember to update your packages (TeX Live, MacTeX, MiKTeX) after the installation as well!
Changing the compiler to LuaLaTeX instead of pdfLaTeX depends on your editor/compiler workflow. If you are compiling on the command-line, just replace pdflatex with lualatex in your usual script. In VSCode, you can adjust the recipe used (documentation). In TeXstudio, you adjust the build configuration (documentation). In TeXShop, go to Preferences/Typesetting and set the default command.
Afterwards, add the same code block to the top of your documents to get started.
% This command activates the tagging and pdf management code
\DocumentMetadata{
 lang=en-US, %set the language (adjust if not US English)
 tagging=on, % turn on tagging for accessible pdfs
 % produce MathML representation of mathematical content
 %flag the first row of all tables in the document as a header row
 tagging-setup={math/setup={mathml-SE,mathml-AF},table/header-rows={1}},
 % set the pdf standard that this document should comply with/be tested against
 pdfstandard={ua-2,a4-f}}

\documentclass[12pt]{article}
\usepackage{amsmath, amsthm}

% Compile with LuaLaTeX
\usepackage{unicode-math}
\usepackage[olddefault]{fontsetup}
\usepackage{hyperref}

\title{title of document}
\author{your name}
This enables all of the automatic tagging of the structure and mathematics in your document. Each image included in your document needs to either be marked as an artifact if it carries no meaning by adding the artifact key as an optional argument to \includegraphics or have alt text added with the alt={My alt text here} optional argument.
For example, you might have
\includegraphics[artifact]{star_background.png}
\includegraphics[alt={Portrait of Isaac Newton}]{newton_portrait.png}